(If you don’t see the video above, then click here to view it on the website.)
The French Laundry in Yountville, California is consistently rated as one of the best restaurants in the world.
Thomas Keller is the founder, owner, and chef, and is widely renowned as a culinary rock star.
When asked what he would pick as his last meal, he answers simply:
“Roast chicken.”
Unlike most meals you’d expect a three-star Michelin chef to choose for his last hurrah, roast chicken is one of the simplest and most versatile dishes you can make.
It’s one of the select few things you should learn how to cook if you aspire to master the art of kitchen hacking.
Between the juicy meat, crispy skin, and mild flavor that goes with anything, roast chicken is one of the tastiest creations that even the most novice of home cooks can make.
Dispelling the Myths
Let’s first debunk a few folk tales that keep too many people from making roast chicken one of their go-to meals.
No, you don’t need to break out the string and truss it up like your at some kinky S&M dungeon. In fact, just don’t do it at all.
Trussing a chicken reduces the surface area of the bird available for heating, which increases the cooking time. This is particularly problematic since the part you are trussing up (the leg) is the same part that takes the longest to cook through in the first place.
The main reason people truss chickens is for presentation. Everything holds together better and looks purdier on your dinner table.
But if you’re going to eat the damn thing right away anyway, then why all the fuss? Besides, if you’re having people over for dinner they are going to be impressed enough by the fact that you roasted a whole freakin’ chicken that no one will hold it against you if it doesn’t make the cover of next month’s Cooks Illustrated.
Second, you don’t need to baste. (I’ll show you why in the ingredients section.) Throw that sucker in the oven and find something else to do while you wait.
But the biggest thing you need to worry about is in just about every damn roast chicken recipe you are likely to find.
I can’t believe how many times I read that “one of the great things about roasting chicken is that it only takes about an hour.”
Jeeeeee-ZUZ!
There is meat that you can safely eat raw from the supermarket (think beef and seafood), but chicken ain’t one of ’em. In fact, chicken has such a high incidence of such nasty bacteria as salmonella that you should just never even risk eating it undercooked.
For most chickens, an hour in the oven just ain’t gonna cut it.
I’ve been roasting chickens on the reg for more than five years and don’t think I’ve ever even finished one in one and a half hours, much less one hour.
My only guess is that the people writing these recipes are rich enough to afford local, free-range chickens, which are pretty small (though admittedly incredibly delicious).
If you’re like me and are going to buy your 5–6 lb. chickens from the supermarket, then you’d best be expecting that thing to be in the oven for about two hours.
Trust me.
The Ingredients and Equipment
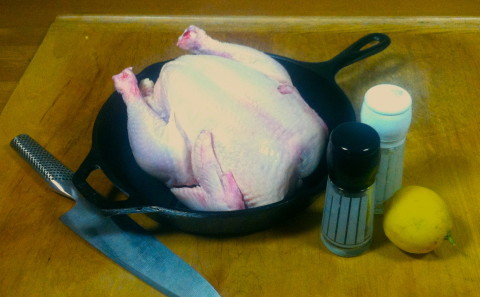
Yeah, you can make roast chicken all fancy as hell, but don’t start off that way. Learn how to roast one with as few ingredients as possible before you start to riff on the melody. Here’s all you really need to get started:
- A whole chicken (Der. You can find these at most supermarkets.)
- Salt and pepper. (Basic seasoning. You DO just keep these on hand, don’t you?)
- One large (or two small) lemon(s). For “basting.” And flava.
The equipment you need is pretty minimal as well:
- A 10-inch (or larger) cast-iron skillet. Technically, you just need any shallow oven-safe dish that will hold the chicken. But if you’re following my minimalist kitchen equipment list, then you should already have the best thing on hand.
- A chef’s knife and cutting board. You’ll only need this for carving up the chicken at the end.
The Recipe
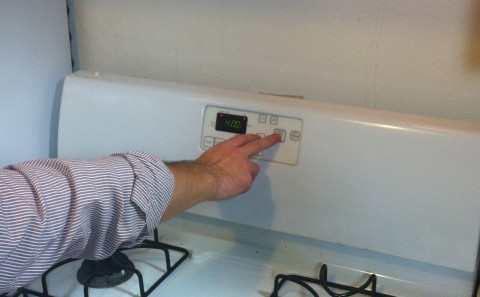
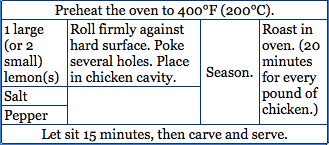
1. Preheat the oven to 400 F (200 C). You’ve got a lot of leeway with temperature, but I’ve found that this is the sweet spot. Hot enough that it doesn’t take ages to cook, cool enough that the outside doesn’t burn before the inside is done.
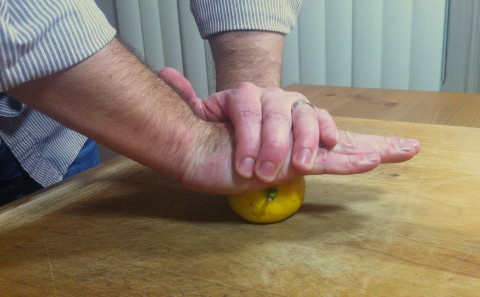
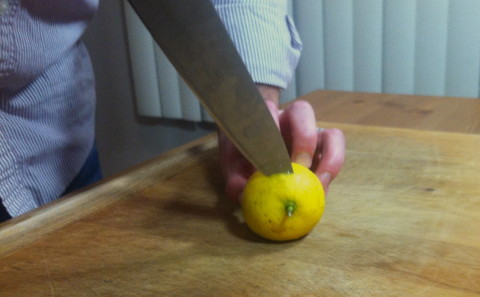
2. Roll the lemon firmly against a hard surface. Poke several holes with the tip of your knife. Then toss in the chicken cavity (aka chicken butt). Here’s the magic of this recipe. The lemon slowly releases its juices during cooking, keeping the meat moist and ensuring that you never need to baste.
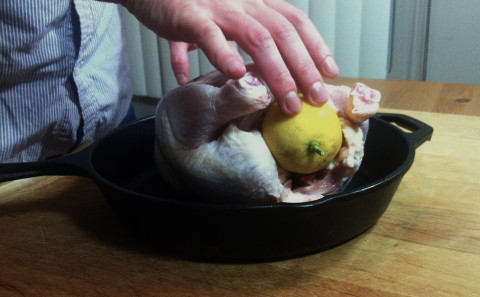
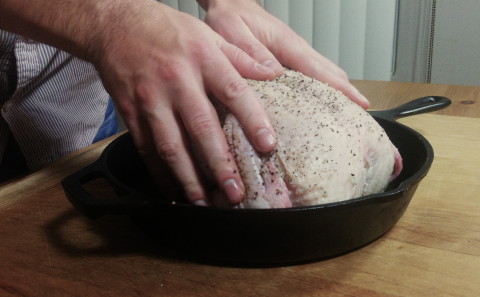
3. Cover the outside with salt and pepper. Make sure you rub it in all around with your hands. (Just make sure to wash ’em afterwards.) If you’re going to be all fancy here and add in more herbs, this is the place to rub them in as well.
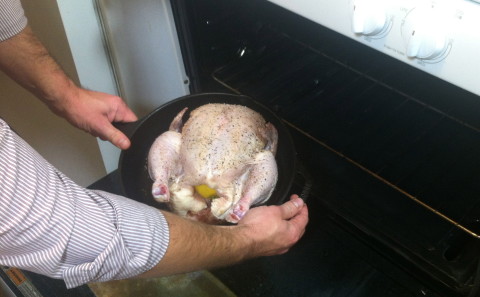
4. Put the whole thing in the oven.
5. When the chicken is done, remove from the oven and let sit for 15 minutes. This gives a chance for the juices to “retreat back into the meat” so you don’t lose them all when you start carving.
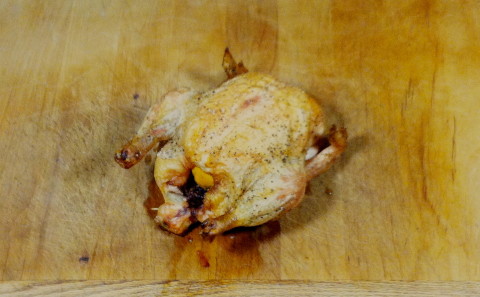
Estimate about 20 minutes of cooking for each pound of bird. You want the internal temperature in the thigh to be 165°F (75°C), which is best measured with a meat thermometer.
But those things are inaccurate, and I’m lazy, so I use the leg twist method. Grab the end of the leg and twist in one direction. A bird that’s done will have a bit of resistance but the connective tissue should separate with a “pop.” If it doesn’t, put it back in the oven for 15 more minutes.
You have a lot more leeway with cooking times with a whole chicken than you do with plain ol’ breasts because the skin keeps the meat from drying out. When in doubt, cook it a bit longer.
6. Carve the chicken up and chow down.
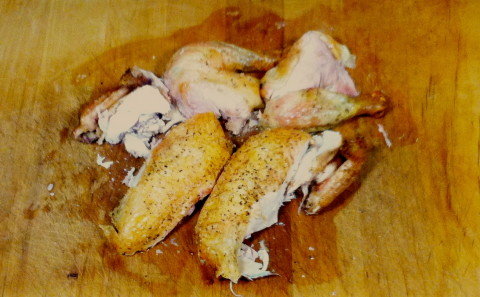
Carving is the most difficult part of roasting a chicken. (Less’n you like to just chow down the thing whole, burp.) But it’s still not all that bad.
Your goal in carving a chicken is to:
- Separate as much of the meat as possible from the carcass.
- Carve the chicken into smaller pieces by cutting through the soft connective tissue that attaches the bones together.
1. Remove the legs from the body. This part is pretty easy. Just cut through the skin that separates these two parts of the bird. You can usually then remove the leg with just your hand.
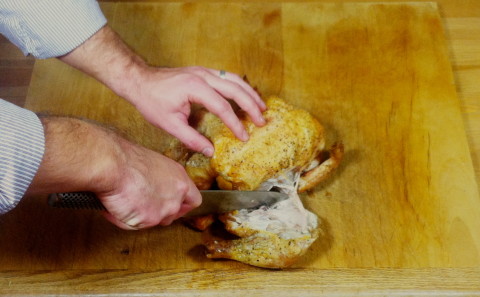
2. Separate the thighs from the drumsticks (optional). If you want to get fussy, you can cut through the “knee” of the bird to separate these two parts. (I never, ever do this.)
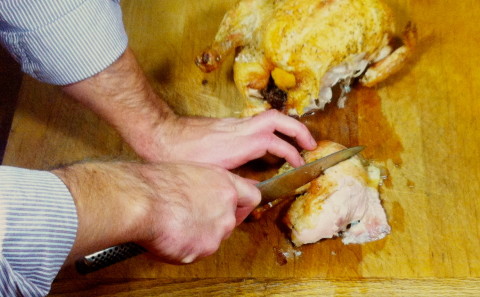
3. Cut off the breasts and wings. This is the most difficult part of carving a chicken. Cut down into the breast in the middle. (There is a piece of bone that sticks out that separates the two sides. Then, slide the blade down the side of the ribcage, separating off as much of the meat from the bone before you slice through the skin. The hardest part comes when you cut the wing off. This joint is kinda hard to find. Just keep at it, and don’t get discouraged if you do a bit of a hack job.
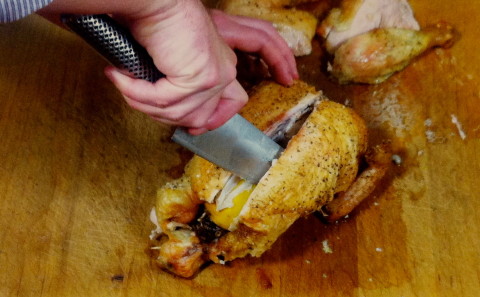
4. Separate the wings from the breasts. This one’s easy. Just cut through the breast close to the wing bone.
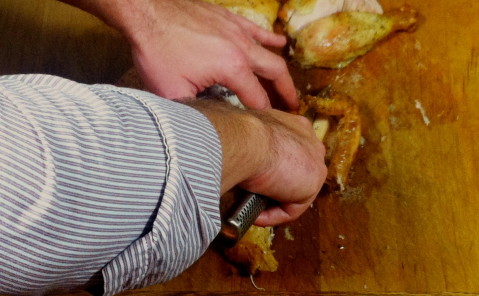
In the video above, I actually did a pretty crap job at carving. But I still got it into small, relatively normal-looking pieces. Which is what really matters.
Don’t expect perfection (or speed) the first time (or 1,001st time) you carve a chicken. It’s a big enough win that you did it in the first place, homes.
The Variations
I honestly believe that you can eat roast chicken every day for the rest of your life and never grow bored with it.
One of chicken’s greatest strengths (and weaknesses) is that it is pretty bland. The flavor you get out of it is primarily because of the flavorings you add to it.
Salt and pepper are basic minimalist additions, but try and mix it up with others as well:
- Add minced herbs along with the salt and pepper. Try rosemary, thyme, sage, or a combination.
- Stuff with aromatic vegetables (onion, garlic, etc.) along with the lemon.
- Add some sauce before serving. Good options include hot sauce, mustard, and soy sauce.
Another great strategy is roasting some starchy veggies along with the chicken. Put a layer of diced potatoes, sweet potatoes, carrots, onions (or anything else) in the roasting pan before adding the chicken.
Not only will this keep the chicken skin from sticking to the pan, but the juices from the bird will drip over the veggies, making them taste like pure awesomeness.
Also, you can make gravy from the drippings if you are feeling ambitious. After removing the cooked chicken from the pan, pour off as much as you can of the top fat layer (no need to get too precise about it).
Then, add some chicken stock (about a half cup will do), and boil. Keep boiling until just a small amount of liquid is left.
You have some leeway here, and you’ll learn over time. But just remember that more liquid=less flavor, and less liquid=more chance of burning.
When you’re done carving the chicken, you can just chuck the carcass in the garbage. Or, if you’re feeling ambitious, you can keep it in a bag in the freezer. When you’ve got a few of these, you can make some bomb-ass stock.
But more on that in a future post.
Go Forth, and Make Roast Chicken!
Roast chicken is a classic meal that appears in cuisines around the world.
It is an incredibly simple dish to prepare that goes well with all types of side dishes and added flavorings.
If you are ever on Death Row and have to choose your last meal, this is one that will be sure to leave you with a smile on your face.
Or you could just not commit any crazy crimes that would cause you to get the death penalty and spend the rest of your life eating roast chicken.
But still.
 I'm a science geek, food lover, and wannabe surfer.
{ 1 comment }
Darrin,
Another great minimalist recipe! Thanks for sharing! In my opinion, the simplest meals to make are always the best.
Alykhan
Comments on this entry are closed.