Call me crazy, but cooking and eating an animal bigger than me sounds like an insane and fun challenge.
When I started the whole hog project, I knew it was gonna be a learning experience, but butchering the entire animal into manageable cuts has been more educational than any college anatomy class could ever be.
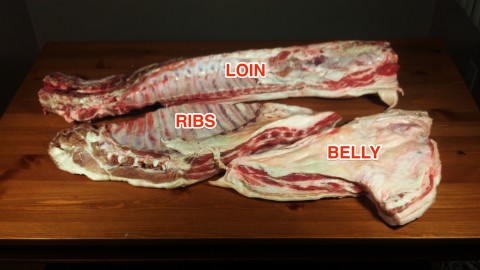
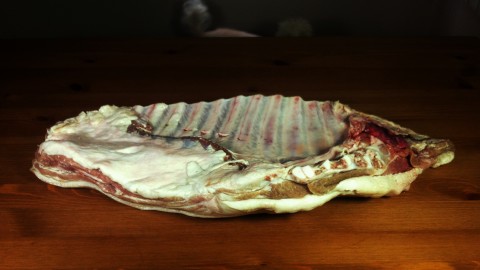
After the relative ease of butchering up the front and rear limbs, I finally move on to the most complex of primals: the midsection.
Unlike the straightforward anatomy of the limbs, the plethora of bones in the midsection makes it far more challenging to break down.
In fact, the midsection is such a beast that I was forced to break out the power tools to get it done!
Will I survive? Will I have all limbs (and digits) intact? Read on to find out! 🙂
The Loin
Of all the sub-primal cuts, the loin is undoubtedly the most difficult to break down, but it gives you some of the most prized cuts.
Pork chops are the most obvious ones found here, but it’s also where you’ll find the tenderloin, and (depending on how the hog was butchered) the country-style ribs as well.
Unlike all other cuts of pork, these are traditionally eaten without the salting, smoking, or confiting that are usually performed for preservation purposes.
Perhaps people have always been eager to throw pork chops on the grill immediately after butchering, but they are certainly the least labor-intensive cut on the hog to cook–and perfect for time-strapped weekday dinners.
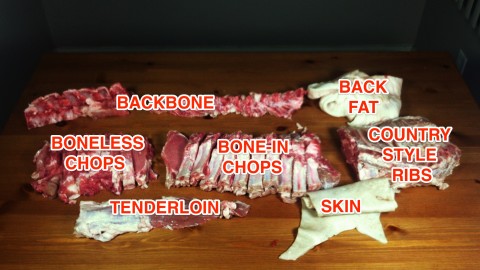
I plan on taking the simple route and butchering the loin into:
- Tenderloin for grilling
- Boneless chops (from the rear of the cut) and bone-in chops (from the center) for frying and grilling
- Country-style ribs to later be deboned and ground up for sausage, rillettes, etc.
- Leftover bones to make stock.
The Ribs
When I was a kid, my favorite food was “garbachewed wibs,” as I called them.
And for good reason.
Ribs are one of the most popular cuts on a hog, and serving them smoked and slathered in a spicy barbecue sauce is undoubtedly the most delicious and classic preparation.
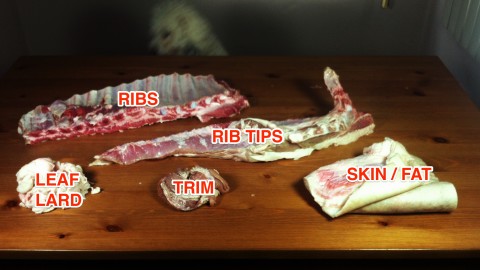
They contain the middle and bottom section of the hog’s ribs (der), including all the meat around and between them. (The upper part of the ribs are found in the bone-in chops from the loin. The more you know…)
It’d be a shame if I didn’t give the ribs the classic preparation of smoking and barbecuing.
The Belly
Pork belly is the most heavenly piece of meat known to man.
It is from this most perfectest cut that we get nature’s most perfectest food.
Bacon is pork belly that has been dry cured and smoked, a delicious clod of pork that can be sliced and fried up for breakfast.
Not that this is the only use for bacon. Far from it.
Like soy sauce and anchovies, bacon lends a salty, umami flavor to any dish it is added to. It’s a welcome addition to soups, braises, and even cookies!
Pork belly can be cooked up without the added curing and smoking, but I’ll be sticking with the classic method.
Because BACON!
Notes On Butchering
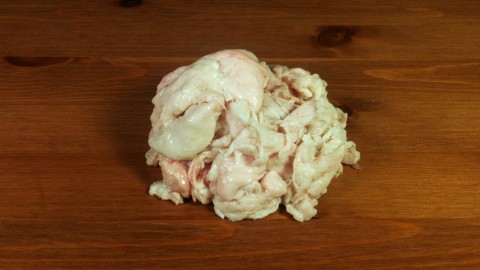
First and foremost, the interior of the midsection is where you’ll find leaf lard, one of the most prized types of fat in the world.
This is the “crumbly” fat that is easy to pull out by hand, and I found it all over these cuts. Make sure you remove them and store them together so you can later render it into lard for baking and cracklins.
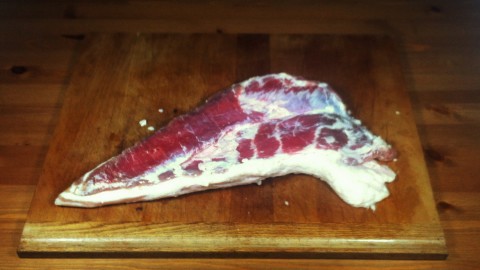
The belly is the easiest sub-primal here to butcher. Since it contains no bones, you can carve it up however you please, but I will be curing the triangular cuts whole (skin and all) for my bacon.
Easy ’nuff.
The ribs are where you need to break the knife out, but it’s still pretty straightforward.
While the ribs are (obviously) made of bone, the bottoms abruptly transition into cartilage.
Many cultures prize these “rib tips”, but they are more often removed in the States.
I’ll be hewing close to this tradition and cutting up some St. Loius style ribs, with the rib tips removed and meat later cut off for use in sausages, rillettes, etc.
I should also here mention that the ways that hogs get butchered can vary dramatically.
Although I had the rib tips attached to the ribs proper, my research has found that you are just as likely to have the butcher cut through the rib cartilage in the first place, leaving the cartilaginous tips on the belly cut, which need to be removed before making your bacon.
But nothing was so confusing, so complex, so utterly terrifying than the loin section.
Butchering the loin was such an experience in and of itself…
Butchering a Pig Loin or, How I Learned to Stop Worrying and Love the Reciprocating Saw
Although there are plenty of resources for butchering a loin online, none of them looked quite… right.
I mean, the bones were there, sure. Everything looked so similar, it was just really tough to tell up from down, front from back.
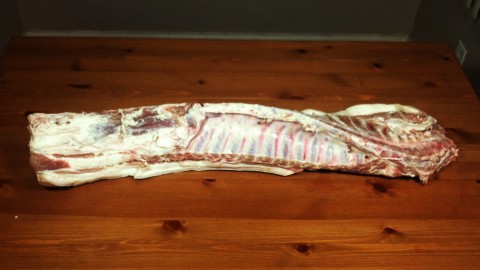
It was only after I finished butchering this section that I realized why–my loin contained a large part of the section around the shoulder and upper back that was always included in the front limb primal cut in all the resources I found online.
So, learn from my mistakes.
No two hogs are likely to be butchered in exactly the same way. Learn as much as you can from the guides I’m publishing, but be aware that some of the parts I’m talking about may very well end up on another primal cut.
Now that we’ve got that out of the way, let’s go on to show the best way a home cook can butcher a loin without putting himself in the hospital.
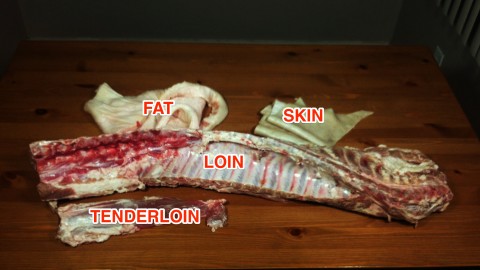
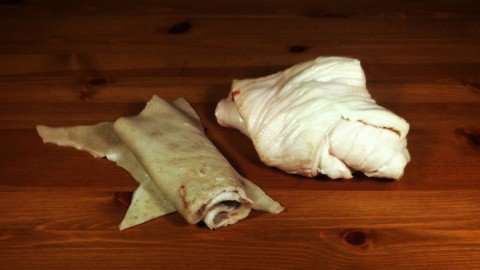
First, separate both the skin and fat from the meat, and then the skin and fat from each other.
With the exception of leaf lard, the fat found underneath the skin of the pig’s back contains the most prized cooking fat on the pig. Best to separate this out for rendering, and use the skin for pork rinds.
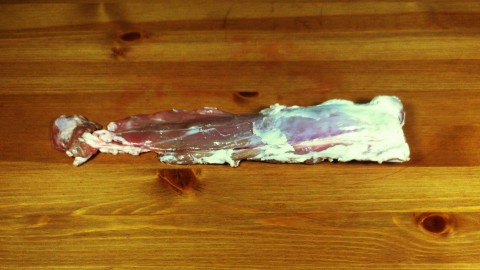
Next, remove the tenderloin. This long cut of meat is one of the most delicate on the pig due to its relative lack of use.
It also will help you to tell which part of the loin is up, down, front, and rear, which will come in handy on the next step.
Just remember that the tenderloin is the triangular cut of meat always found in the rear third of the loin tucked underneath the spine, and you should be able to use the knowledge that the ribs are on the bottom of the hog to orient yourself.
The tenderloin can simply be removed by running a sharp knife between it and the ribs, and then it and the spine.
Now you need to break out the power tools.
Although I’ve read that you can butcher an entire pig with no more than a sharp knife and a chisel and mallet, most sources will also tell you that the job will be much easier with a saw.
I also read that a reciprocating saw is better than a normal saw, because it is more agile and can cut more efficiently due to being electrically powered.
But if you’ve never used one before, it can be a really terrifying experience!
As I psyched myself up to use this power tool, all I could think of is how likely I was to lose a finger, or worse!
These power saws are great for cutting through stuff, but require you to use both hands to hold it steady. But if you need to hold down the pork with one hand too, this can get a little scary.
Here’s how I did it, and suggest you do it as well:
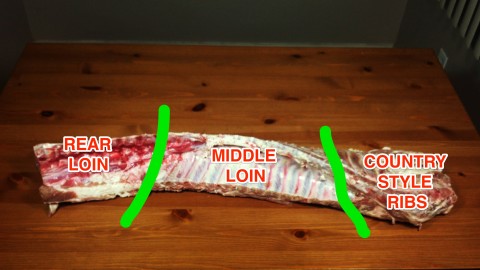
1. First, cut through the backbone of the loin just to the rear of the last rib. (And the country-style ribs if they are attached.) You can hold onto the saw with both hands here, so there’s no big chance of injury.
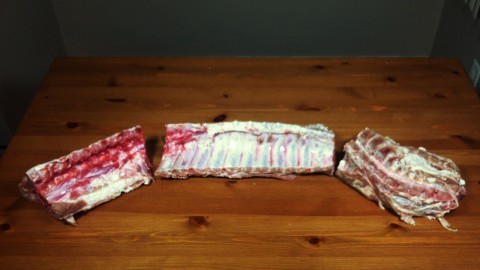
 2. Then, use a kitchen knife to cut through the meat where the bone was sawed through to split the loin in two. One section contains all the ribs, and will provide us with our bone-in chops, the rear section has the hip bone, which will be de-boned and sliced up into boneless chops.
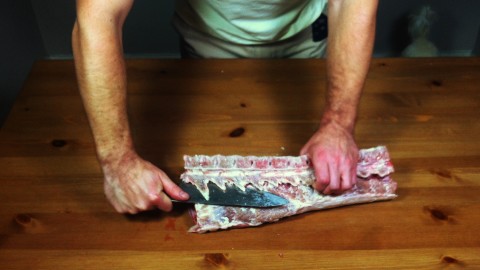
 3. For the loin cut with the ribs, take a knife and cut the meat away from the backbone. The next step is to use the power saw to cut through the ribs at the point where they meet the backbone. By cutting away this meat, we get a feel for where the saw needs to go through, and “clear a path” so we can use the tool just for cutting through bone, and not meat.
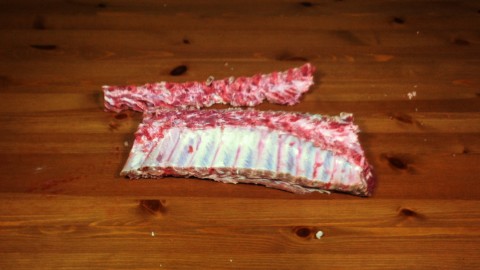
 4. Now, use the power saw to cut along the spine and separate the backbone from the ribs. Again, you want to make sure that you are only cutting away the backbone and aren’t leaving meat on it, so don’t skip step 3. Put the rear end of the loin or any other heavy object behind the loin you are cutting. This will help to keep it in place while you are cutting. By doing this, you are able to keep both hands on the saw and safely perform the most dangerous cut in butchering your hog while minimizing risk of injury.
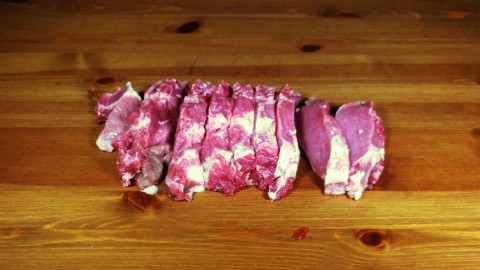
 5. Slice the bone-in loin into chops, with each rib constituting one cut. Now that the hard part’s over, you can unplug the saw and go back to cutting with a plain ol’ knife. By using the rib spacing as a guide, you can get nice, thick, evenly-sized hunks o’ pork for the grill.
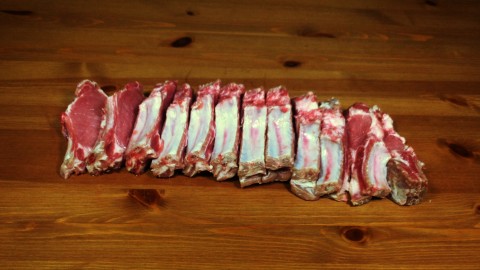 6. Debone the hip bone from the rear cut of the loin. Now move on to the other cut of loin remaining, and you’ll find a whole ’nother problem. The hip bone is bizarrely-shaped, and there’s no ribs to make bone-in chops here, so it’s best to just go after it with a knife, a decent amount of time cleared out, and a whole lotta caution.
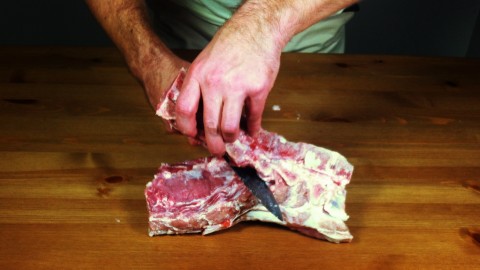 7. Once you’ve finally removed the hip bone, slice up the meat into the same thickness that the bone-in chops are.
A Pain to Butcher, But What a Treat
There’s no doubt about it. Compared to the relative ease of butchering the front and rear limbs, the midsection of a hog is quite challenging.
But when you realize that this is where you get delicious smoked bacon, barbecued ribs, and grilled pork chops, you’ll find that it’s worth the effort to get these wonderful cuts of meat out of there.
In the final article on whole hog butchery and how I’m planning to cook this entire animal up piece-by-piece, I’ll be looking at the nasty bits. The head, the innards… Y’know, the fun stuff.
So If you’re easily offended by such images, I suggest you end your subscription to the blog now. For you more adventurous souls, be prepared for seeing what it really means to go the whole hog!
 I'm a science geek, food lover, and wannabe surfer.
Comments on this entry are closed.